Tracking Conversion Events In Meta Pixel
How to track conversion events in Meta ads from the BankingBridge Embed using Google Tag Manager
Prerequisites
To implement this integration, you must have a Google Tag Manager account with a container snippet installed on the website where the BankingBridge tool will be embedded.
Important:Pages, where Google Tag Manager (gtm.js) is installed should not contain any Google Analytics (gtag.js) tracking code.
To ensure that the BankingBridge Tool loads the data layer necessary to collect events with Google Tag Manager, remove any hard-coded gtag.js tracking code from your website before implementing Google Tag Manager and following these instructions.
Adding a Meta Pixel to Google Tag Manager
Add a new tag
- Log in to your Google Tag Manager account.
- Open the Default Workspace (or create a new workspace if you prefer).
- On the Overview screen, click Add a new tag.

- Enter "Meta - Base Pixel" as the tag name.
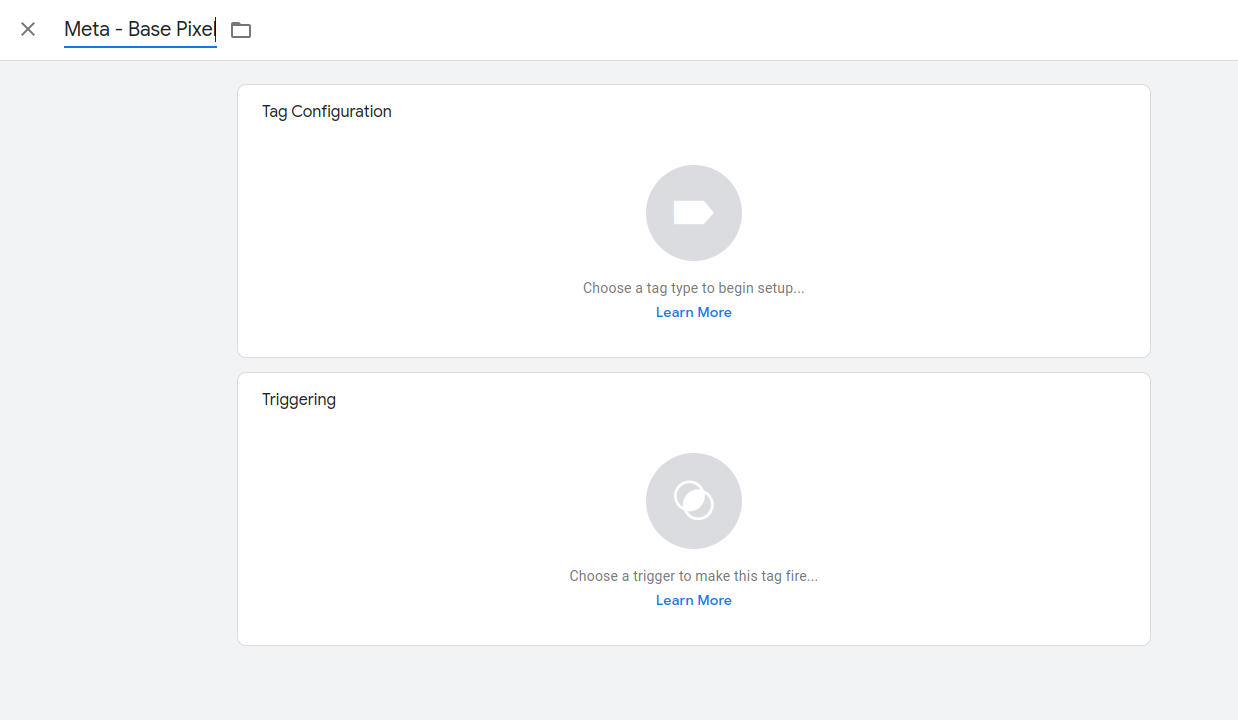
Configure the new tag
- Click the Tag Configuration box and select Custom HTML as the tag type.
- Open a new browser tab and navigate to Meta Events Manager and select Add Event.
- Select From a New Website.
- Select Install code manually.
- Select Copy Code to copy the entire Pixel base code.
- Return to Google Tag Manager and paste the code into the HTML container (you will see your Meta Pixel ID in place of the
xxxxxxxxxxxxxxxin the example below).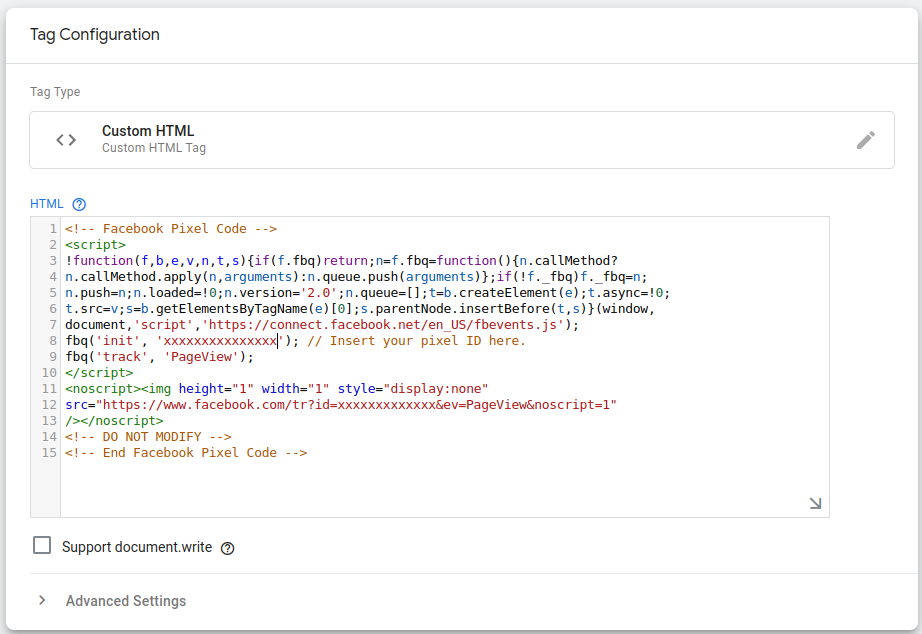
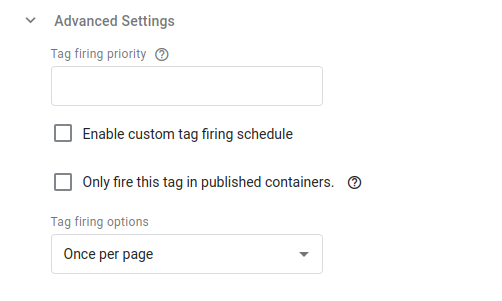
- Expand Advanced Settings and select Once per page under Tag firing options.
- Click into the Triggering box. The Choose a trigger menu opens.
- Select the All Pages trigger.

- Once your trigger has been selected, click Save in the upper-right corner.
Adding a Meta conversion tag to track captured events
Once you have installed your base code, you can create a specific Meta tracking tag for the BankingBridge Lead Captured Event.
- In Google Tag Manager, click Add a new tag.
- Select Custom HTML Tag
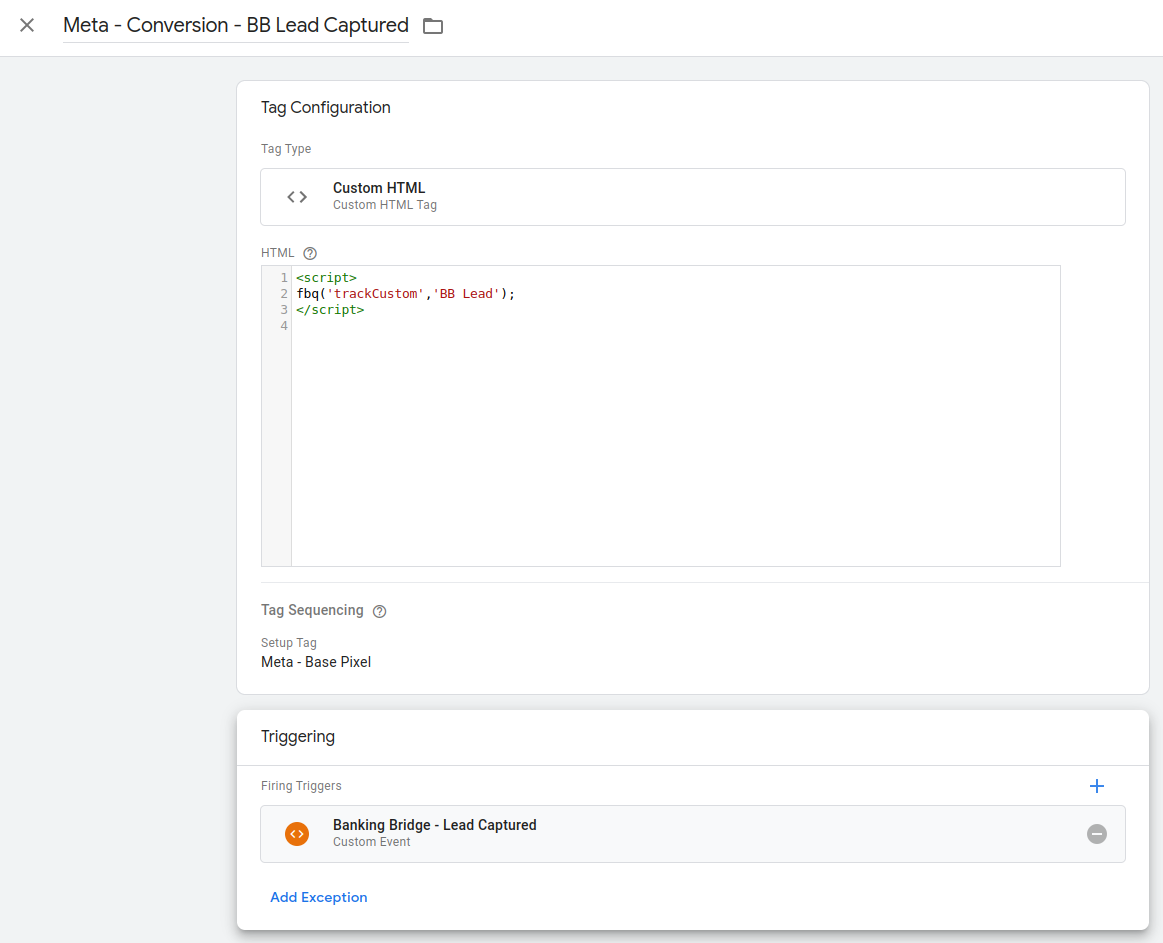
- Name your tag "Meta - Conversion - BB Lead Captured", then insert the following code:
<script>
fbq('trackCustom','BB Lead');
</script>- Under Tag Sequencing, check the box Fire a tag before Meta - Conversion - BB Lead Captured fires and select your base code tag to ensure this tag fires after your base code.

- Click into the Triggering section to add a trigger.
- Click
 to add a new trigger.
 - Name the trigger "Banking Bridge - Lead Captured" and click into the Trigger Configuration section.
- Select Custom Event as the trigger type.
- Type "BBEvent" in the Event name box.
- Select the option to fire this trigger on Some Custom Events.
- Choose the dlv - event_action variable from the list and set it to equals lead_captured.

- Click Save.
- Ensure your configuration matches the following example:
- Click Save.
- When you are ready to publish your changes, click Submit in the top-right of the Google Tag Manager Overview screen.
- On the Submit Changes screen, type "Banking Bridge Meta Conversion Events" in the Version name box.
- Click Publish.
When you have returned to the Google Tag Manager Overview screen, your changes are live on the site, and events should start recording in Google Analytics.
Create tags for the other events on your website in the same way. When you're finished creating tags, click Publish.
Confirming that your Meta Pixel is working
Once you've added all your events and leads have been captured, you should check if your Pixel is working correctly.
To check that your Pixel is working correctly on your live site:
- Navigate to the web page where your Pixel was added.
- Open the Pixel detail page in Meta Events Manager. If your Pixel is working, its status will be Active, and you should see activity reported in the dashboards. Learn more about your Pixel data in Events Manager.
If your Pixel's status is No activity yet, use the Meta Pixel Helper to troubleshoot the problem:
- Once the Pixel Helper is installed in your Chrome browser, a small icon appears next to your address bar.
- Navigate to your website in your Chrome browser and click the Meta Pixel Helper icon. You can see which Pixel events were found on the page and whether they have loaded successfully, or see troubleshooting tips if there are any issues. Learn more.
Updated about 1 year ago