Create Loan Summary Worksheets
This guide provides step-by-step instructions for integrating BankingBridge Loan Summary PDFs or JPEGs into your CRM using Zapier.
Prerequisites
- A Zapier account
- Access to your CRM’s Zapier integration or API
- A BankingBridge account
The Integration Procedure
Step 1: Request Access to the BankingBridge Zapier Application
- If you haven’t received an invite to the BankingBridge Zapier application, email [email protected] to request one.
- Once invited, accept the link to begin creating your Zap.
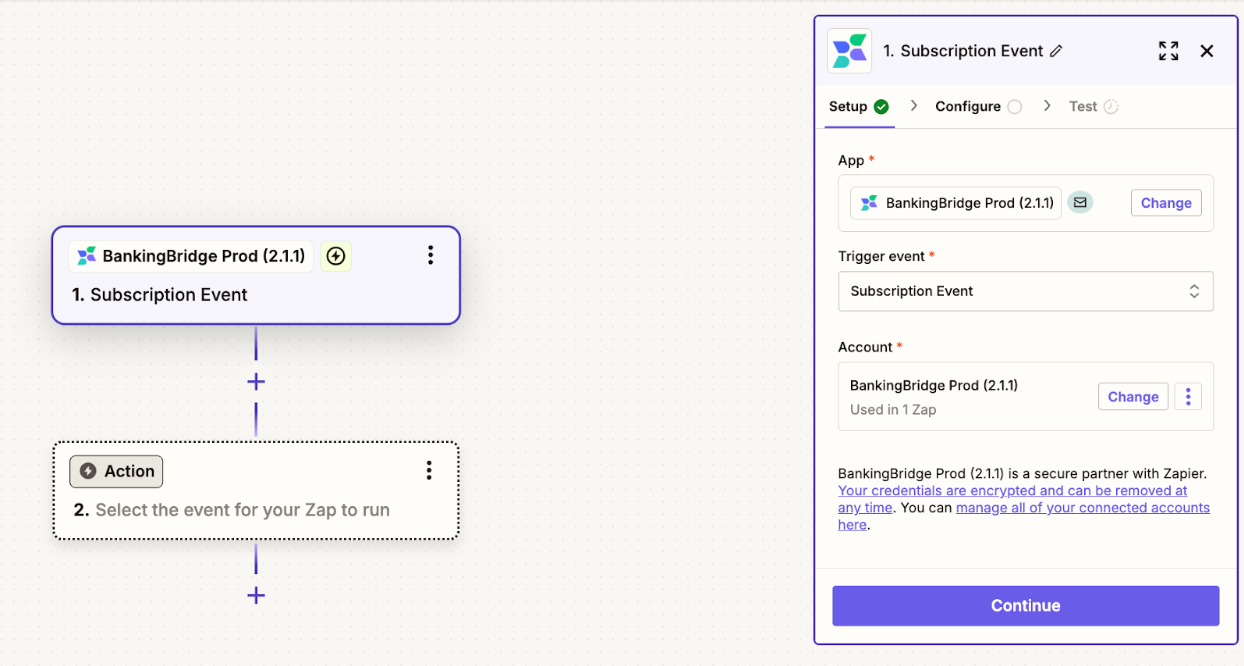
Step 2: Create a Zap & Set Up the Trigger
-
In Zapier, click Create Zap.
-
Select BankingBridge as the trigger app.
-
Choose a trigger event that fits your workflow, such as:
- CRM Updates – Trigger when a CRM field is updated.
- BankingBridge Subscription Events – Trigger when a subscription event (e.g., "Created" or "Dashboard Update") occurs.
- Scheduled Triggers – Automate based on a set schedule.
-
If using BankingBridge Subscription Event triggers:
- Find your Brand ID in BankingBridge at cloud.bankingbridge.com/brands.
- Enter your Brand ID in Zapier and click Test Trigger to verify events.
-
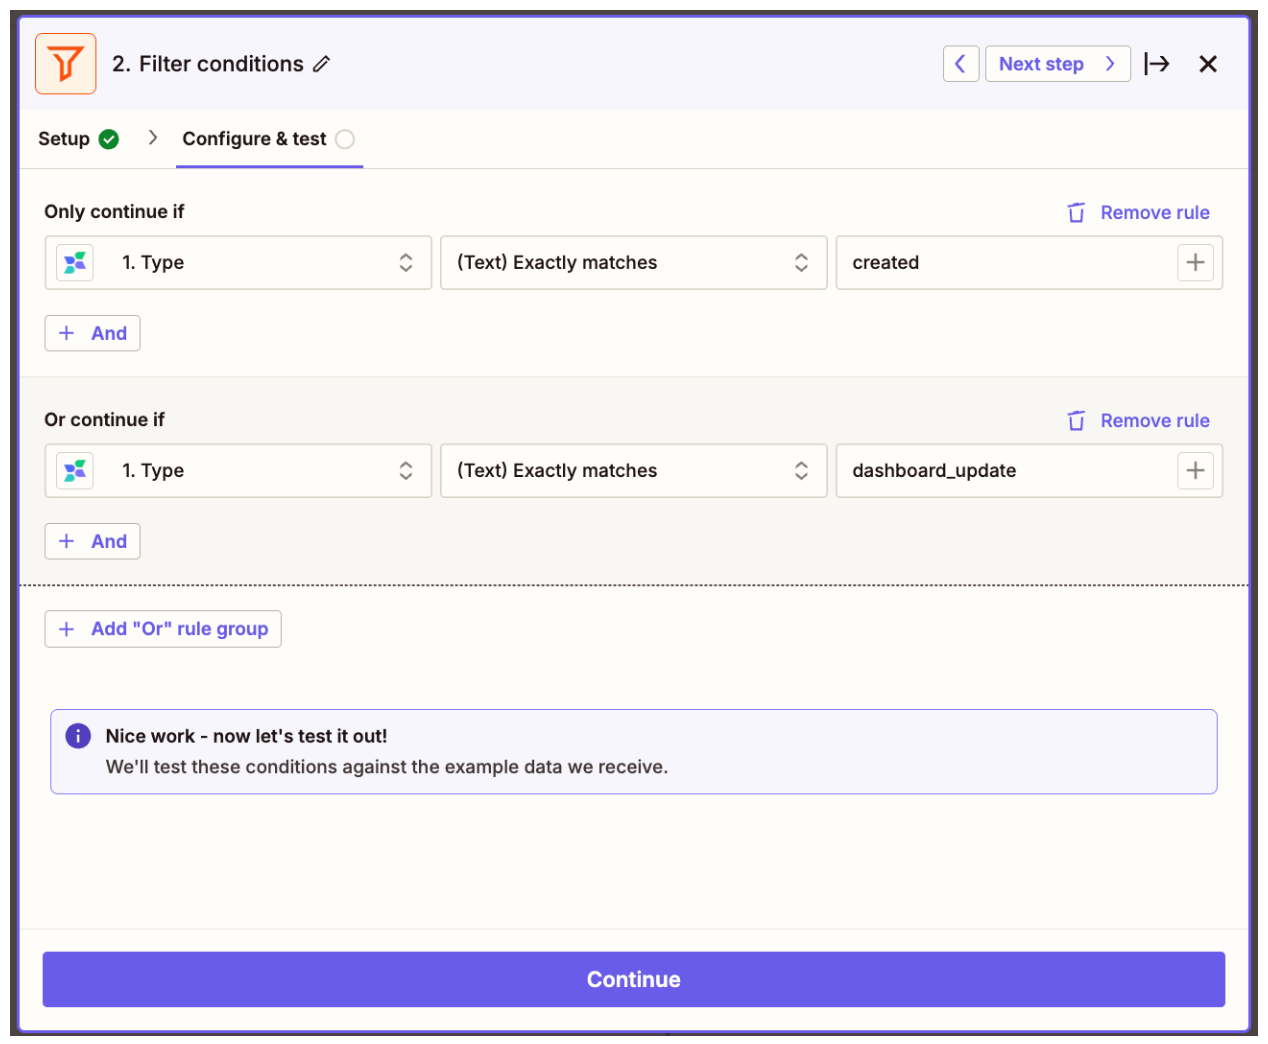
(Optional but recommended) Use Zapier’s Filter step to refine event triggers (e.g., filter only for "created" and "dashboard_update" events).
Step 3: Add the Create Loan Summary Report Action
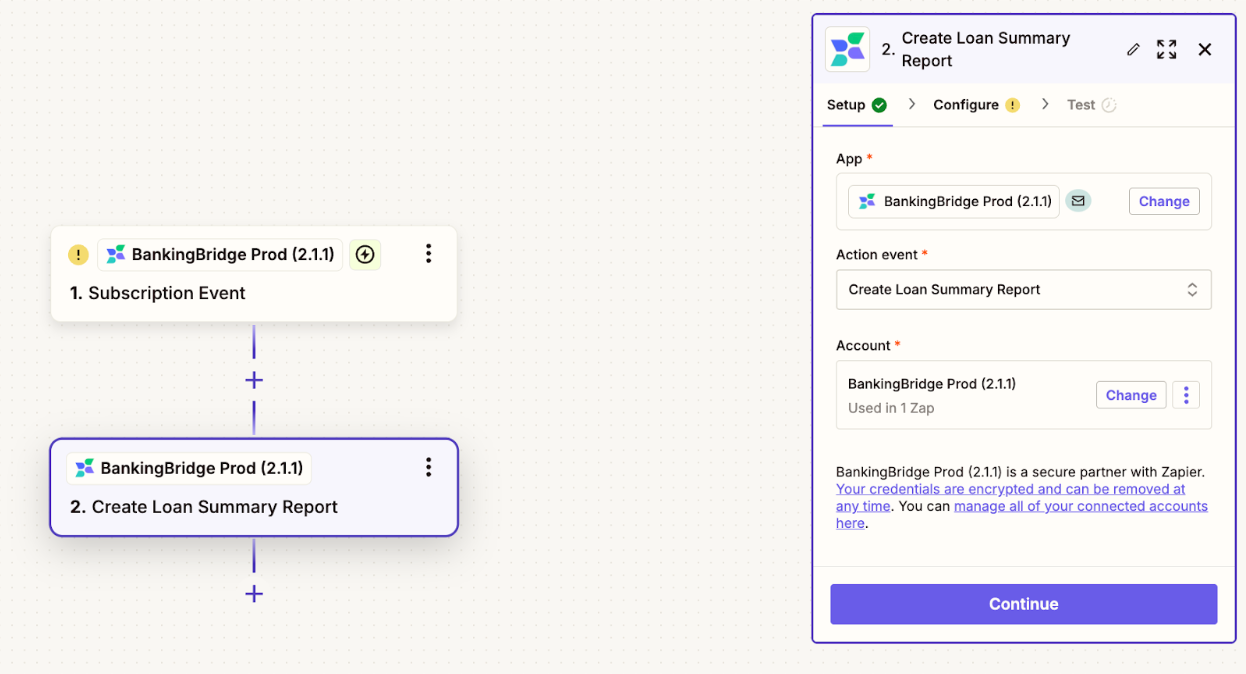
- Click the + button to add an action step.
- Select BankingBridge Prod as the app.
- Choose Create Loan Summary Report as the action event.
- Ensure your BankingBridge account is connected.
Step 4: Configure the Loan Summary Report Action
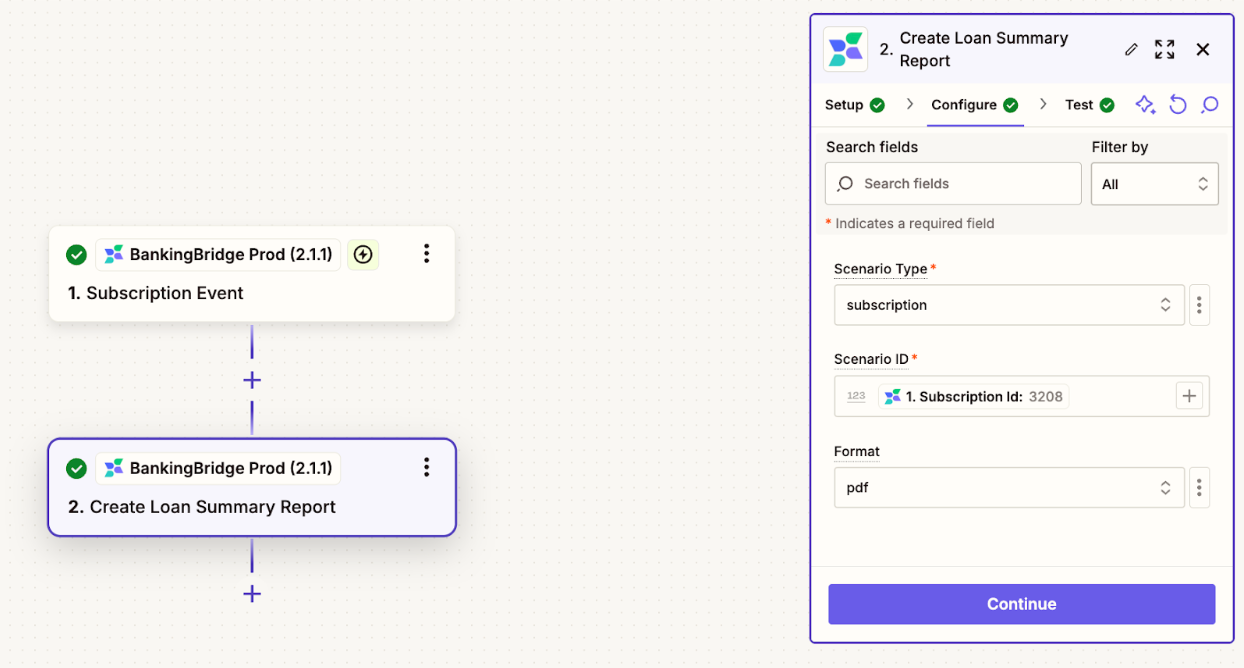
- Choose the Scenario Type:
- A subscription scenario requires the Subscription ID, found by clicking the + in the Scenario ID box and selecting Subscription ID.
- A lead Scenario: Requires the ID, found by clicking the + in the Scenario ID box and selecting ID.
- In the Format box, select pdf(single rate) or jpeg(multiple rates across top).
- Click Continue.
Step 5: Test & Retrieve the Report URL
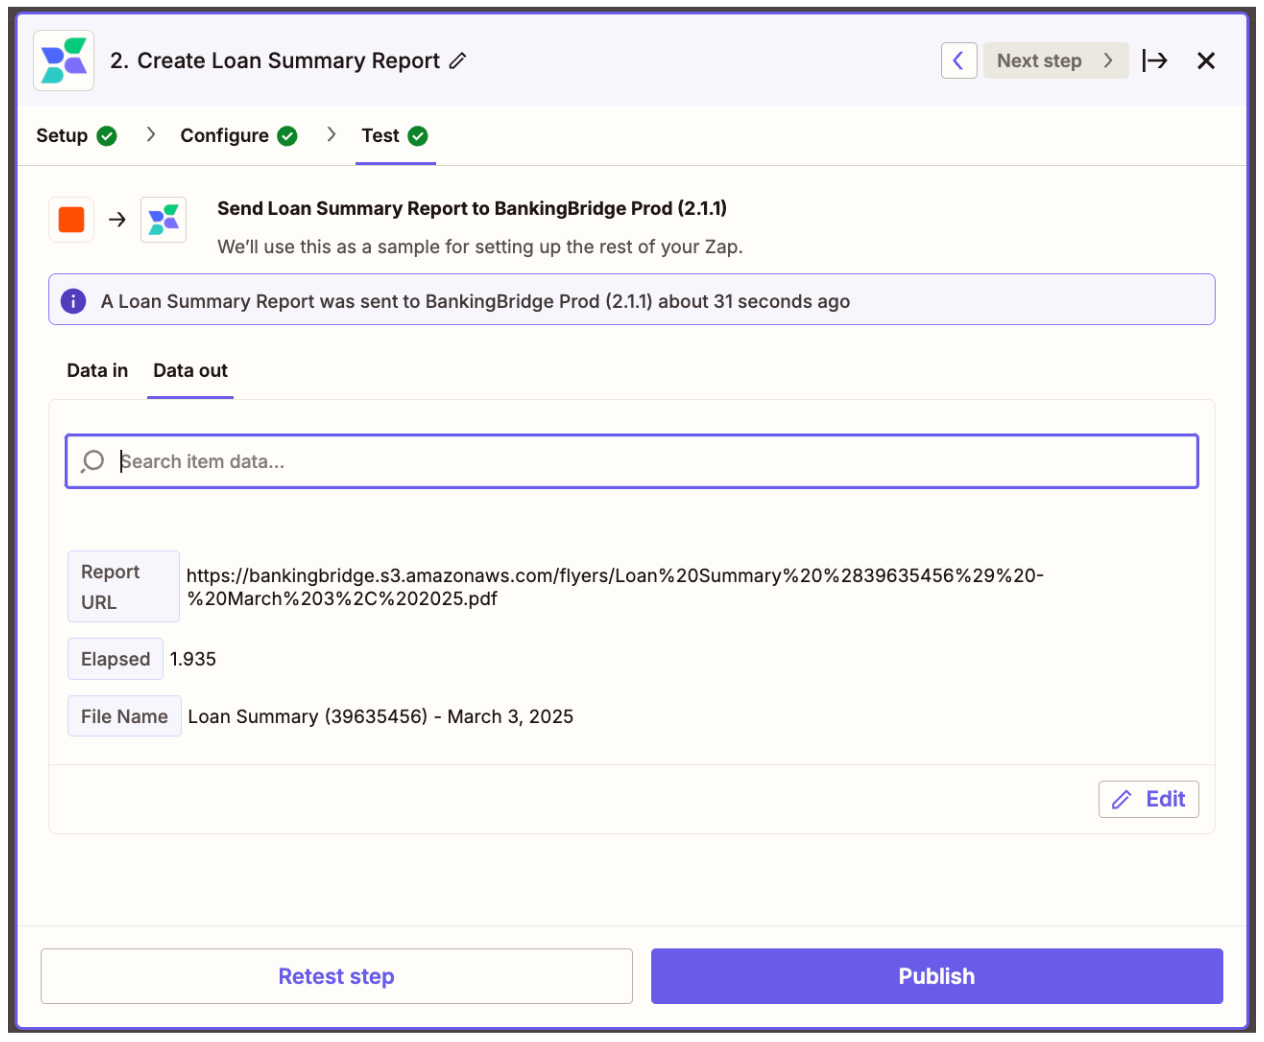
- Click Test Trigger to generate a loan summary file request.
- Locate the Report URL in the test results.
- (Optional) If your CRM has character limits, use a URL shortening service to generate a smaller link.
Step 6: Send the Loan Summary File to Your CRM
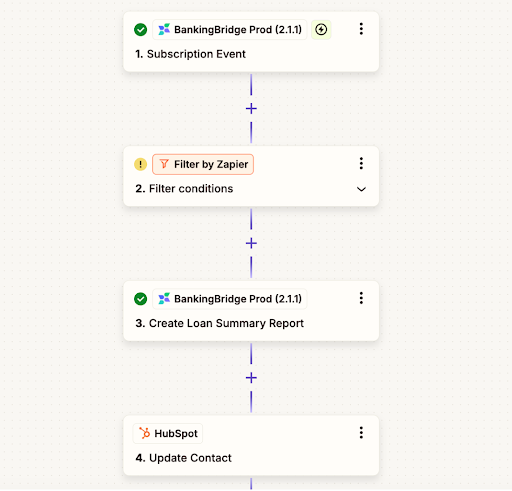
- Add an action step in Zapier to send the report URL to your CRM.
- Depending on your CRM setup:
- If your CRM supports Zapier, use its Zapier app to update records.
- If your CRM does not support Zapier, use POST by Zapier to send the URL to the CRM’s API endpoint.
- Ensure your CRM has a designated field to store the report URL.
- (Optional) Store the
lead_idandsubscription_idin your CRM for future API calls.
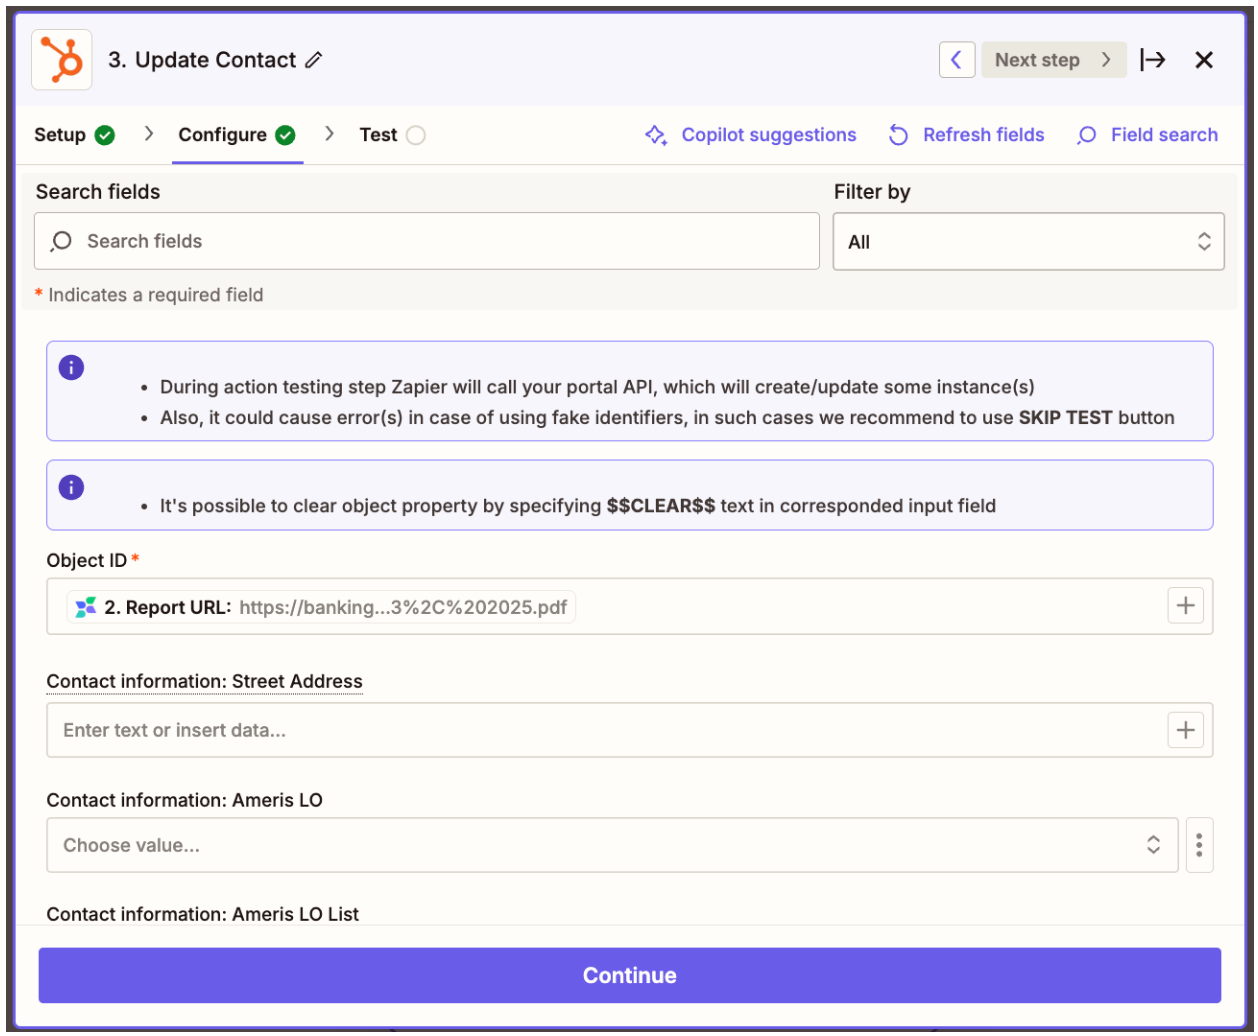
Example CRM Integration (HubSpot)
- Use the HubSpot Zapier app to update a contact or deal record.
- Map the Report URL to an appropriate field in HubSpot.
- Store the
lead_idandsubscription_idin custom fields for reference.
Troubleshooting & Support
- For assistance, contact [email protected].
- Integration steps may vary based on your CRM’s capabilities and workflow requirements.
This integration streamlines how loan summaries are stored and accessed within your CRM, ensuring efficiency and automation in your workflow.
Updated about 1 year ago
Did this page help you?