Adding BankingBridge Event Tracking to Google Tag Manager
Prerequisites
- Google Analytics account with at least one GA4 property set up. If you are running Universal Analytics, please read Integrating with Google Analytics and Tag Manager.
- Google Tag Manager account with a container snippet installed on the website where the BankingBridge tool will be embedded.
ImportantPages where Google Tag Manager (gtm.js) is installed should not have Google Analytics (gtag.js) tracking code installed. Failure to remove all gtag.js calls from the page when GTM is installed will cause the BB Tool not to load the necessary data layer to collect events with Google Tag Manager.
Add a new tag
- Obtain your Google Analytics property ID (“G-” ID). For instructions, click here.
- Log in to your Google Tag Manager account.
- Open the Default Workspace (or create a new workspace if you prefer).
- On the Overview screen, click Add a new tag.

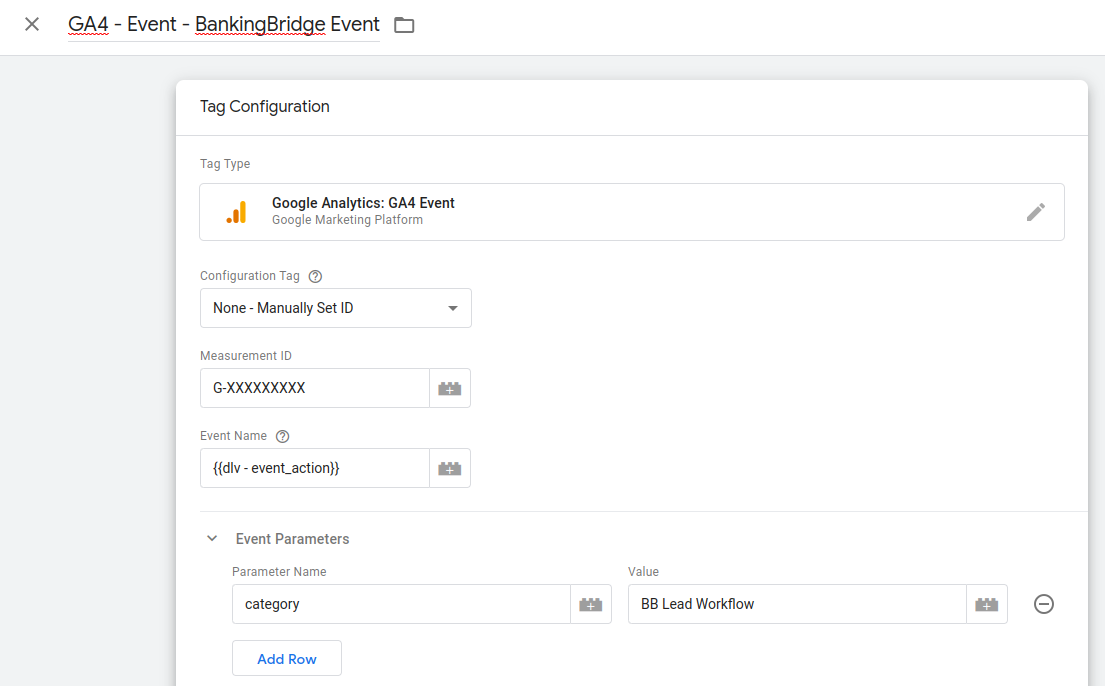
- Name the tag "GA4 - Event - BankingBridge Event".
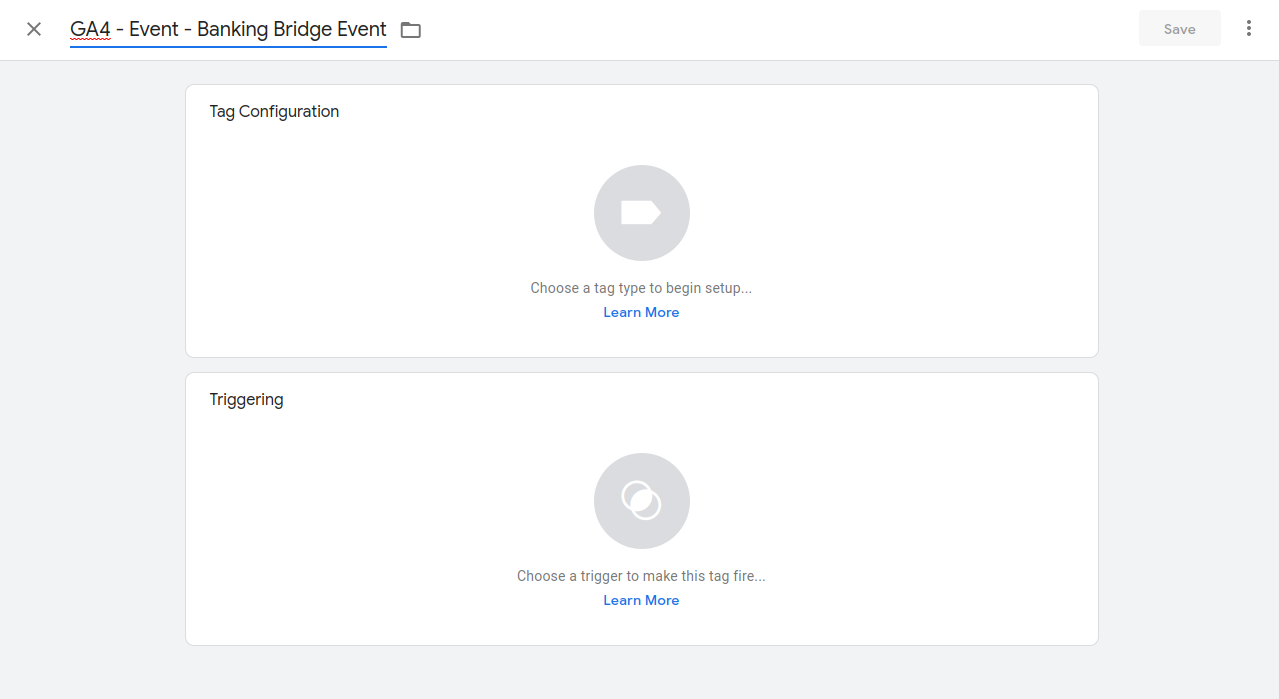
Configure the tag
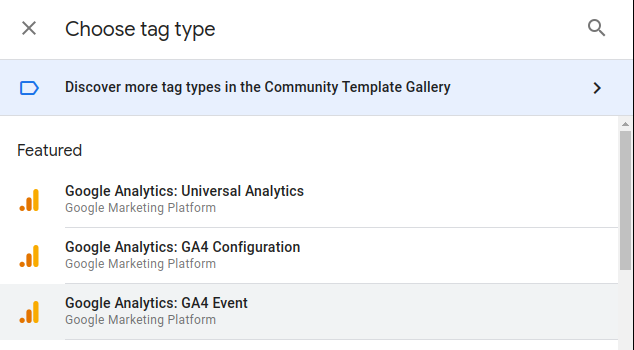
- Click into the Tag Configuration box.
- Select Google Analytics: GA4 Event as the tag type.
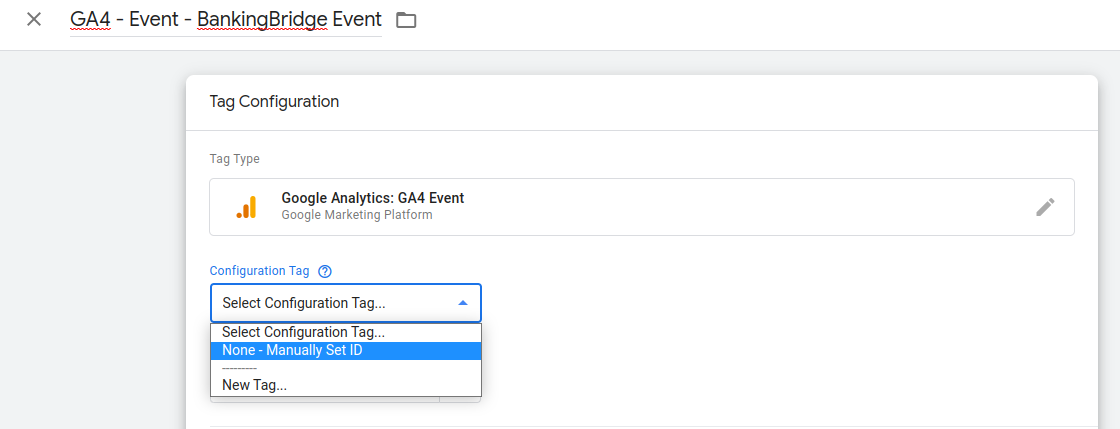
- In the Configuration Tag dropdown, you will see a list of GA4 configurations available in your container. If you have already set up a configuration tag for the appropriate GA4 property, select it here and skip to the next step. Otherwise:
- Select None: Manually Set ID.
- Enter your Google Analytics 4 Property ID that you obtained in step 1.
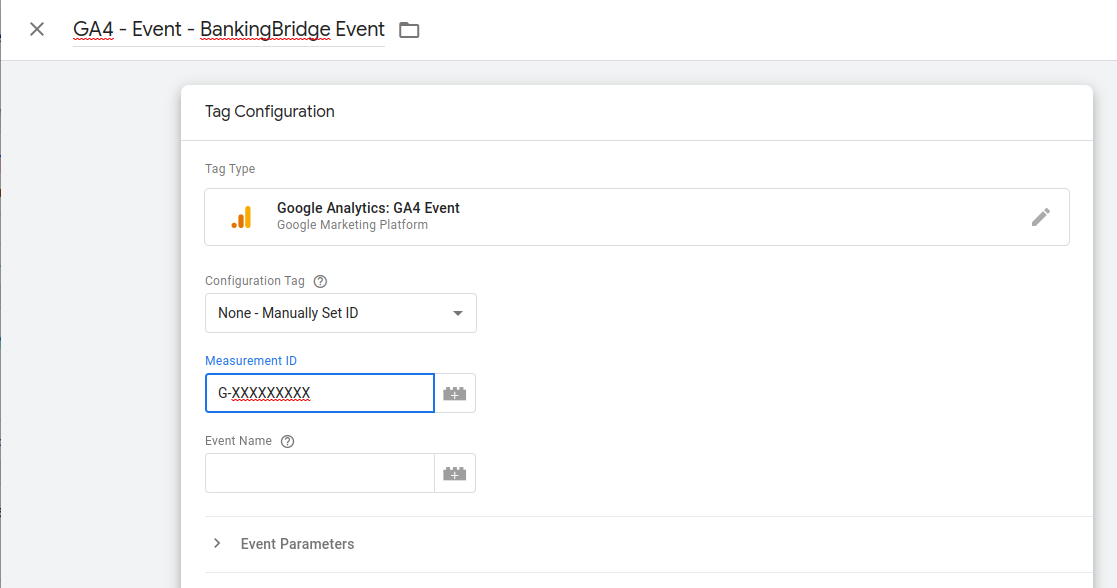
- Select None: Manually Set ID.
- Next to the Event Name field, click
 to add a new variable.
 - In the Choose a Variable screen, click
 to add a new variable.
 - Name the new variable "dlv - event_action" and click the Variable Configuration box.
- Select Data Layer Variable as the Variable Type.
- In the Data Layer Variable Name box, type "event_action".
- Click Save in the top-right to save the variable. You will be returned to the Tag Configuration screen, and you should see the new variable {{dlv - event_action}} show up in the Event Name box.
- Expand the Event Parameters section, add a parameter called "category", and set the value to "BB Lead Workflow".
Add triggers
- Click the Triggering panel below the Tag Configuration box.
- Click the to add a new trigger.
- Name the new trigger "Banking Bridge Event" and click the Trigger Configuration box.
- Select Custom Event as the trigger type.
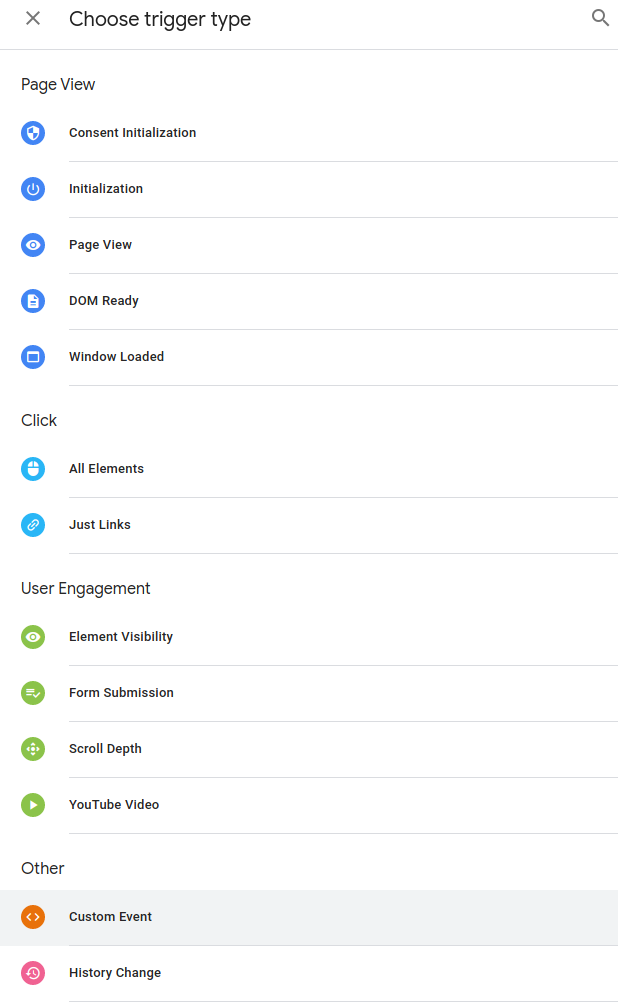
- Type "BBEvent" in the Event Name box.
- Click Save in the top-right to save the trigger.
Save the new tag
- Review the Tag Configuration and Triggering panels to verify that everything is correct.
- Click Save to save the new tag.
Test the tag configuration
NoteThese steps are optional.
- Click Preview. A new browser tab will open Google Tag Assistant.
- Type the URL of a page containing the BankingBridge embed and click Connect. A new browser window will open with your site in GTM preview mode.
- Go through all of the steps in the Lead process.
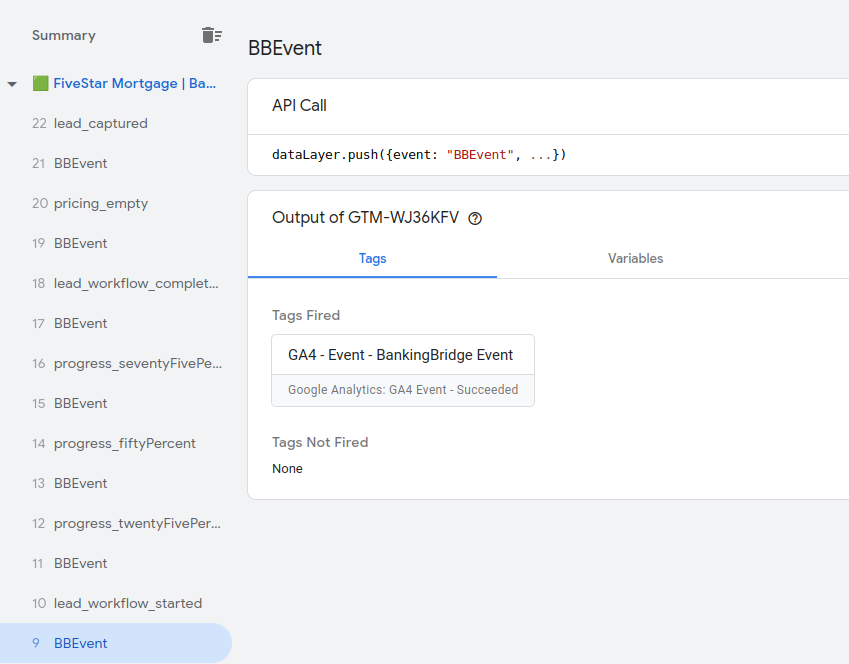
- When finished, return to the browser tab running Google Tag Assistant. Look for messages in the left pane called BBEvent.
ImportantIf you do not see the BBEvent messages, it is likely that you have hardcoded gtag.js calls on your page, and you will need to remove them before proceeding with these instructions.
- Click one of the BBEvent messages and ensure that the GA4 - Event - BankingBridge Event tag is listed under Tags Fired.
 .
. - Click the GA4 - Event - BankingBridge Event tag to view its details.
- In the top-right, select Display Variables as Values.

- Ensure that values are loaded in the Event Name and Event Parameters fields and that your Measurement ID is correct.
NoteThe value of Event Name will vary depending on which stage of the workflow the user has reached.
- Once you have verified that everything functions correctly, close the window with your web page and the Google Tag Assistant tab in your browser.
Publish your changes
- When you are ready to publish your changes, click Submit in the top-right of the Google Tag Manager Overview Screen.
- In the Submit Changes screen, type "Banking Bridge Google Analytics Events" in the Version name box.
- Click Publish.
When you have returned to the Google Tag Manager overview screen, your changes are live on the site, and events should start recording on the Google Analytics Page.
Updated about 1 year ago